When news started coming out about coding assistants moving to token-based pricing, I thought it was a good time to see how far I could get with a fully local setup.
For this whole experiment, I used a three-year-old MacBook Pro M2 with 32 GB of unified memory, so this wasn’t done on some ridiculously overpowered AI workstation.
My goal was to build a DIY GitHub copilot like coding assistant workflow for infrastructure development that uses local LLM models. I was aiming for similar agentic capabilities, meaning that the LLM could generate files for me and understand the surrounding context.
I decided to test it out with Bicep since it’s the IaC language I’m most familiar with. That made it easier to evaluate whether the generated output was actually usable.
High-level workflow
The setup itself was fairly simple (excluding the tweaking part, but you can hopefully skip most of that by following this tutorial). I used local LLMs through LM Studio and connected them to the Continue extension in Visual Studio Code to get a Copilot-like experience.
You should probably use Ollama for a more consistent long-term setup, but when you’re testing different models and trying to figure out what works best for your use case, LM Studio is a very user-friendly option.
The basic workflow looks like this:
- Run a local LLM model in LM Studio using server mode
- Give the LM Studio server URL to the Continue extension
- Let Continue handle the integration inside VS Code
On top of that, you’ll also need to provide proper instructions for the agent if you want decent code output, but more about that later.
LM Studio
LM Studio is a desktop application for running large language models locally on your own machine. It provides a user-friendly interface for downloading, managing, and testing open-source AI models without requiring cloud services or complicated command-line setups.
It supports features such as:
- Downloading and running local LLMs
- Model management and switching
- OpenAI-compatible local API server
- GPU acceleration support
- Chat and inference testing
One of LM Studio’s biggest advantages is how easy it makes local AI experimentation. It also integrates well with tools like Continue for Visual Studio Code.
Continue extension
Continue is an open-source AI coding assistant extension for Visual Studio Code that allows you to connect both cloud-based and local large language models directly into your development workflow.
It provides features such as:
- inline code completion
- chat-based coding assistance
- code explanation and refactoring
- workspace-aware context
- custom instructions and rules for projects
One of Continue’s biggest advantages is flexibility. Instead of being locked into a single provider, it can connect to local models through tools like LM Studio or Ollama, making it possible to build a fully private and offline AI coding setup.
Setting it up
LM Studio
You can install LM Studio from here.
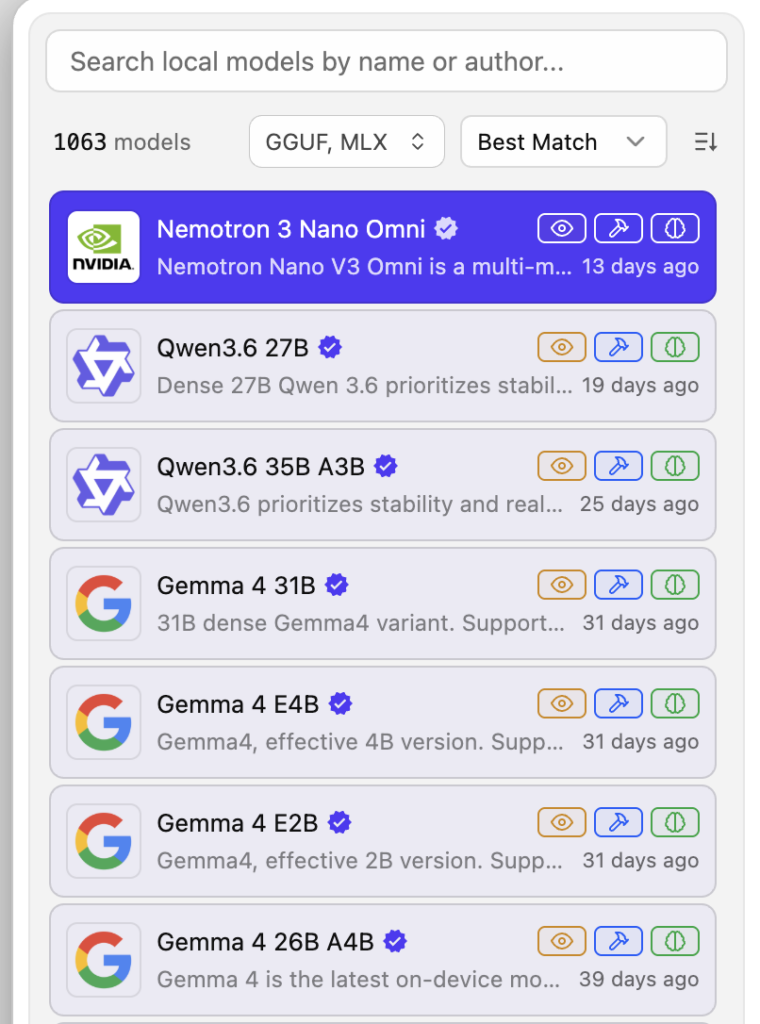
Once you have it installed, you’ll need to download some LLM models. You can do that easily by clicking the icon on the left sidebar:

Good starting points are the Staff Picks models that LM Studio lists first. The tricky part is understanding what all the numbers and abbreviations mean (27B, 4-bit, MoE, MLX, and so on). To help with that, I prepared this local LLM picking guide.
Once you’ve picked a model that fits your machine, you can launch it in local server mode by clicking the Developer icon on the left sidebar.
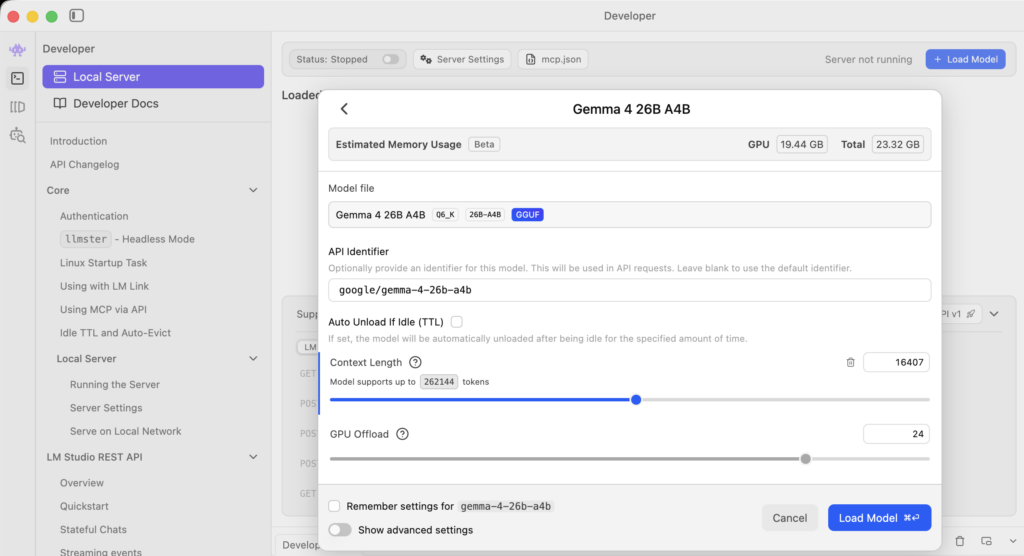
Here, you’ll want to increase the context length because the default value is quite small. You usually can’t use the maximum value since your machine will most likely become the bottleneck. You can estimate memory requirements from the GPU and total memory indicators, but I’d recommend leaving at least 10 GB of RAM free for other tasks to keep your machine running smoothly.
Continue (Visual Studio Code extension)
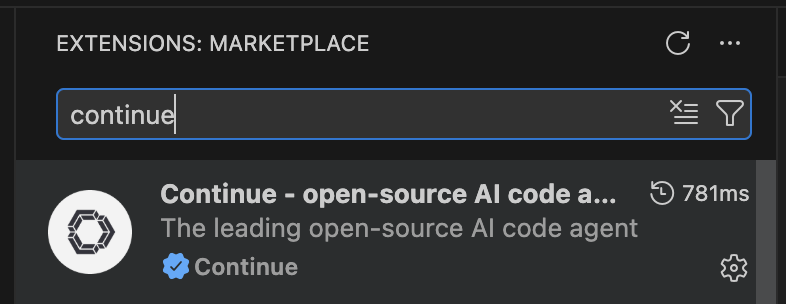
Next, install the Continue extension for Visual Studio Code from the Extensions Marketplace.
Once that’s done, you’ll need to configure it to work with the LLM running in LM Studio.
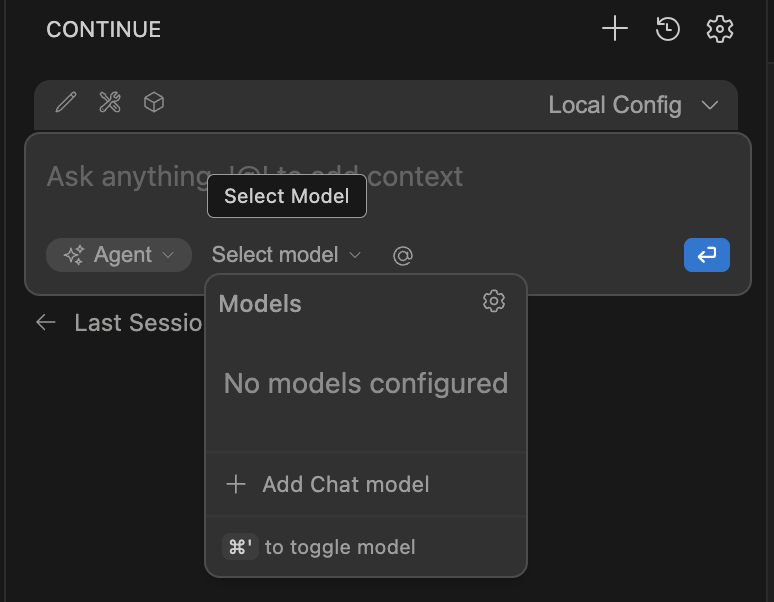
Start by clicking the Continue icon on the left sidebar.

Then click:
- Select model
- Add Chat model
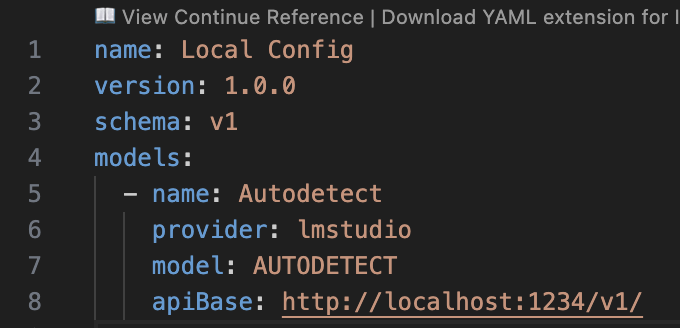
For the provider, select LM Studio, and for the model choose Autodetect.
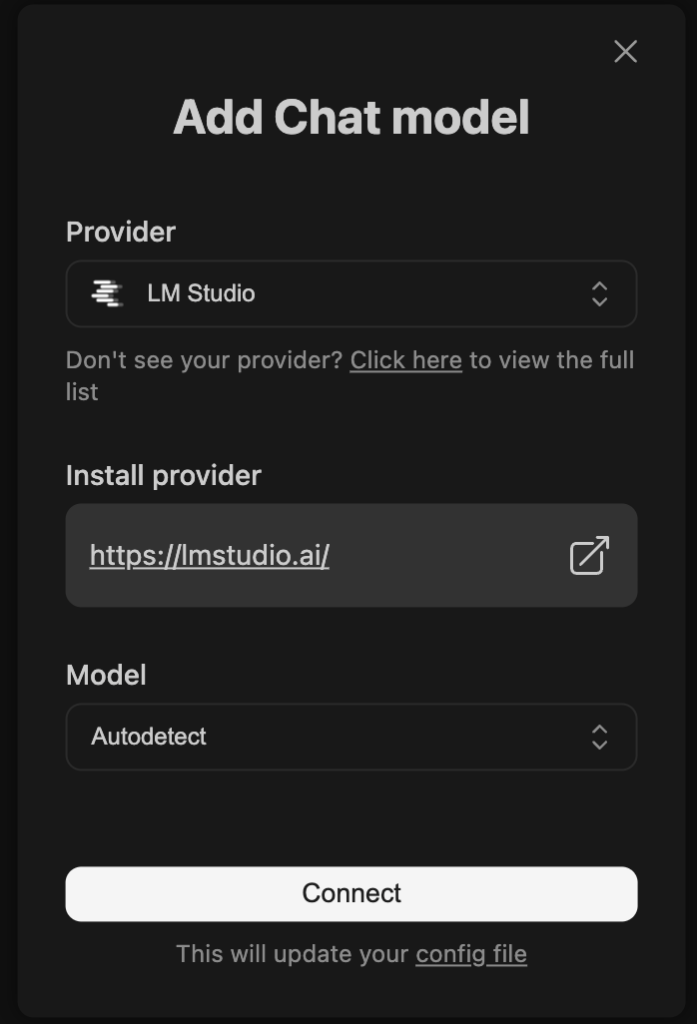
Continue will automatically generate a configuration file for you, which you can later tweak if needed.
You should now see your models in the list.
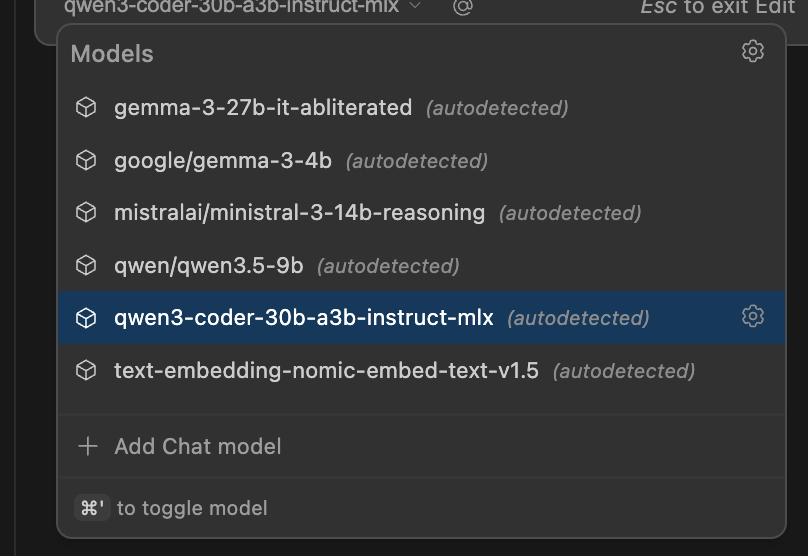
Select the model you currently have loaded.
If you select another model, LM Studio will automatically load it, but it won’t unload the previous one automatically. Be careful with this, since you can fill up your memory surprisingly quickly.
At this point, you’re ready to start building with your own local “Copilot”!
How it works in action
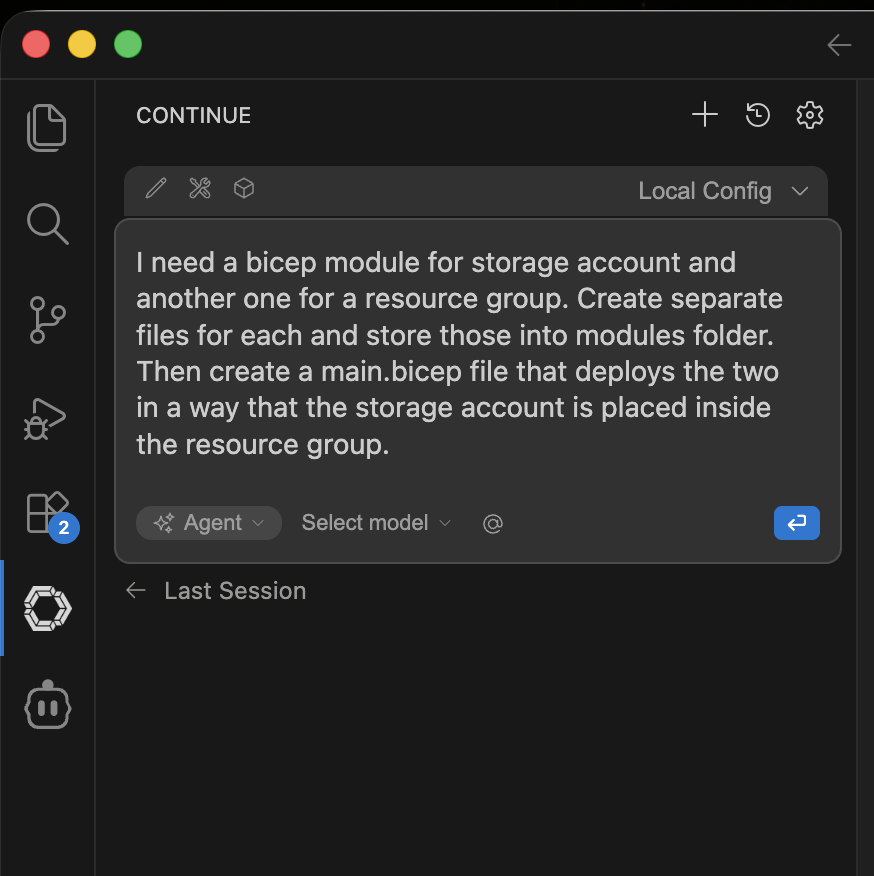
Continue runs on the left side of VS Code instead of the right side like GitHub Copilot, but otherwise the workflow feels very similar.
You have access to chat mode, agent mode, plan mode, and so on. You can chat with it like you would with Copilot, attach files for context, and ask it to generate entirely new files.
How well everything performs depends heavily on how powerful a model your machine can run.
With larger models, the experience can get surprisingly close to cloud-level quality. With smaller models, the experience drops off quickly. Very small or heavily compressed models often struggle with coding tasks and may leave out important details entirely.
You’ll also most likely want different models or agents for different tasks.
Let’s try it out!
I started with a simple request:
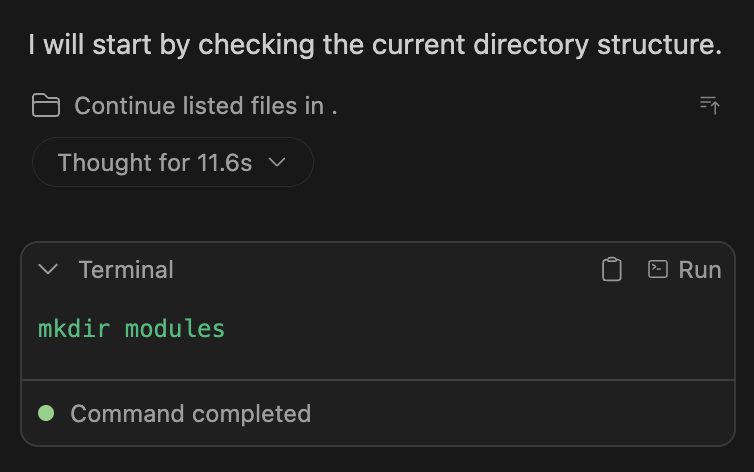
It started working immediately:

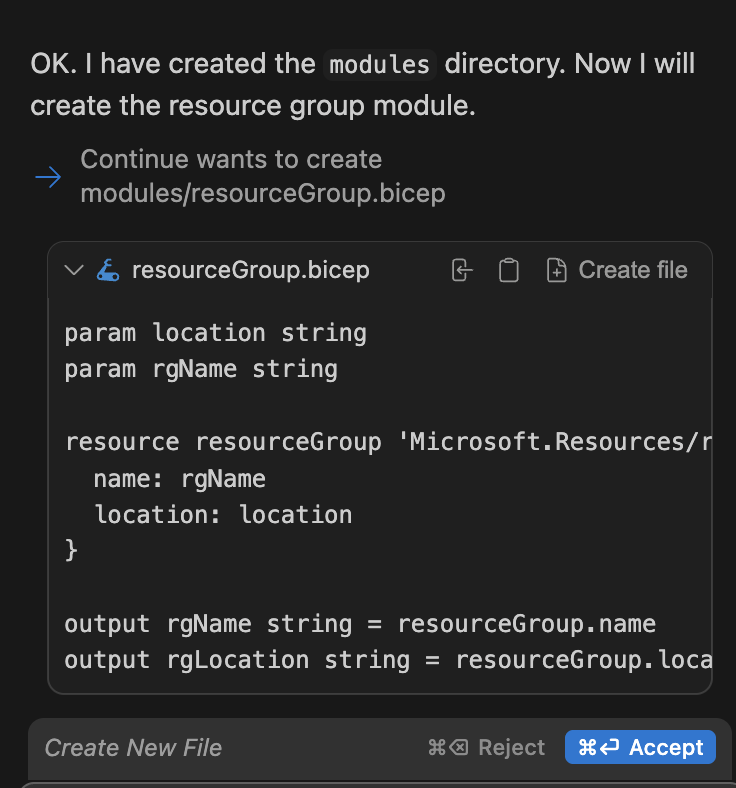
It pauses for confirmation whenever it needs to write files:
These are pretty common issues with it when running on limited resources.
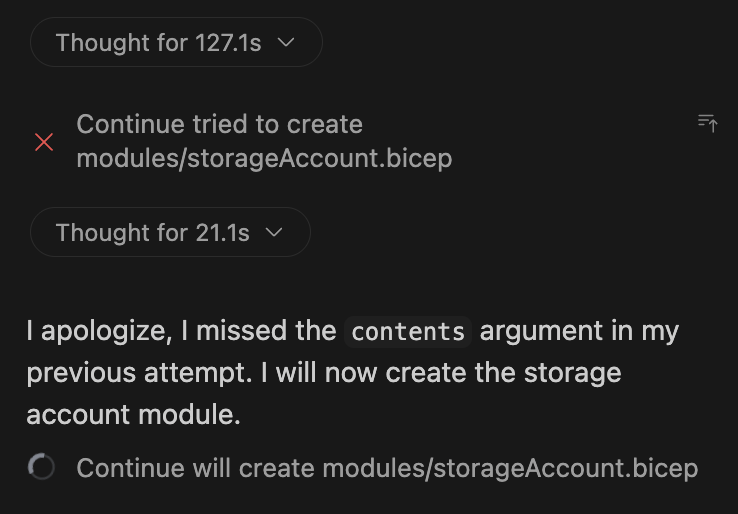
One nice thing is that the agent usually recognizes failures on its own and attempts to recover automatically:
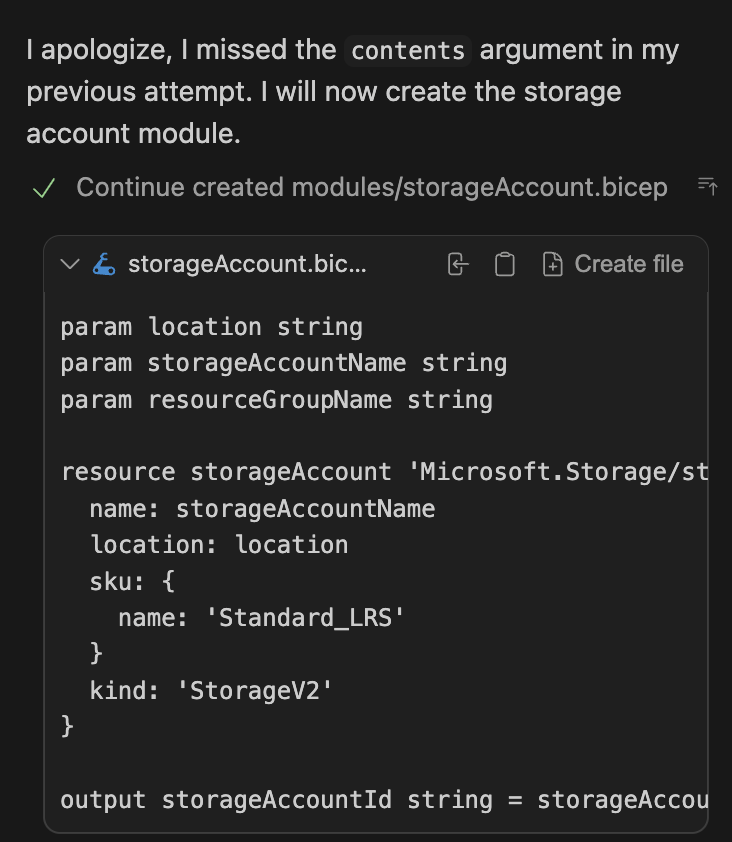
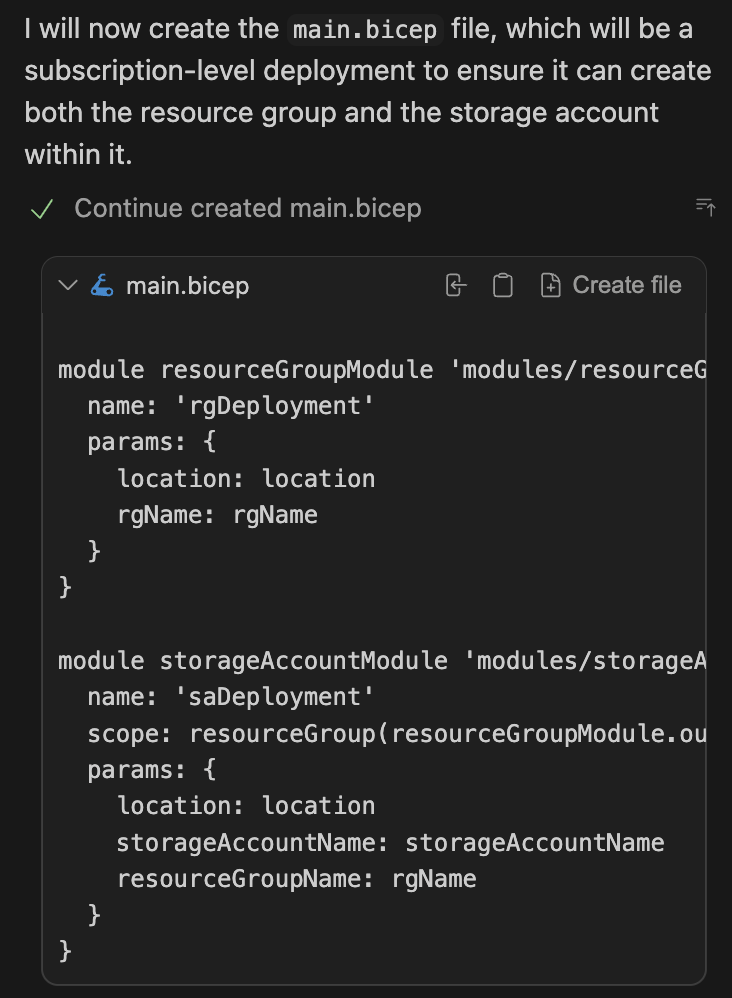
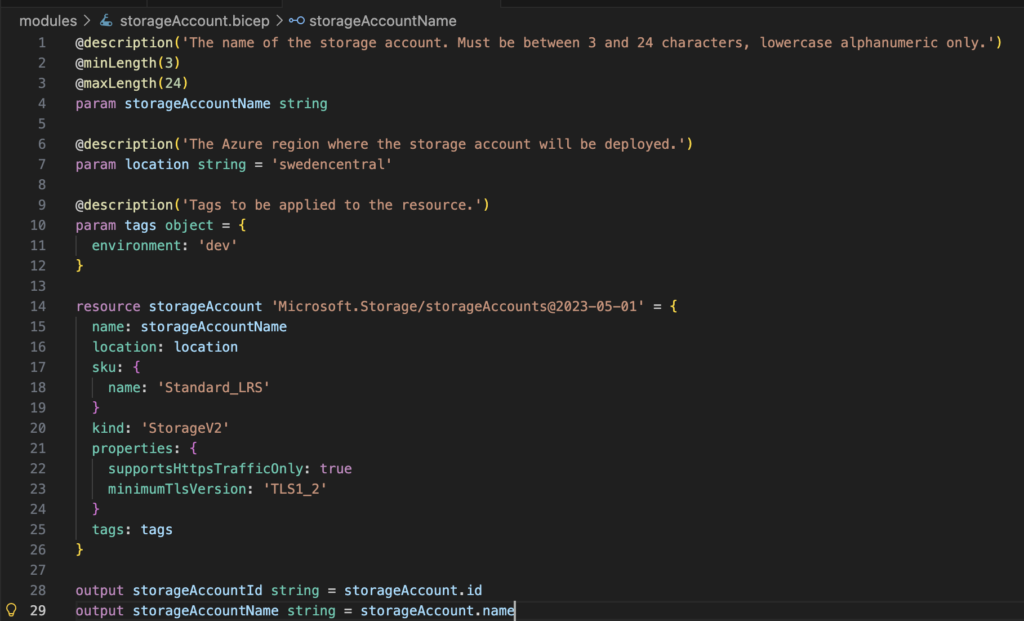
Eventually, it started generating the main.bicep module:
Once the task finished, Continue also generated a summary explaining what it had done. Interestingly, it even noticed a formatting issue in one of the files:
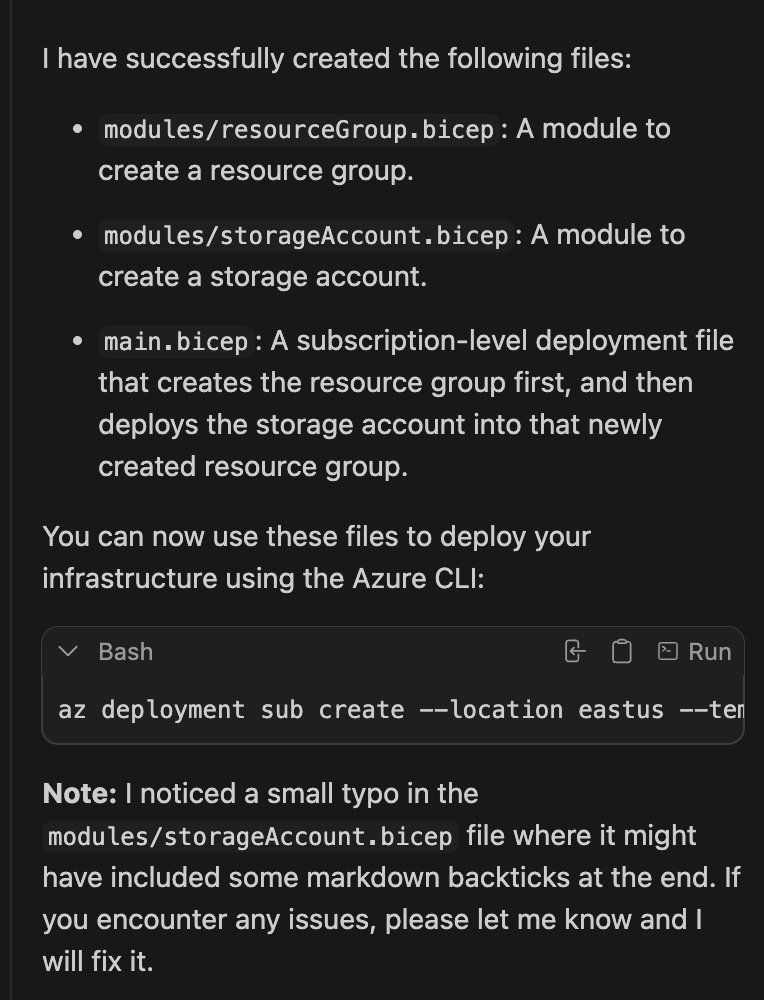
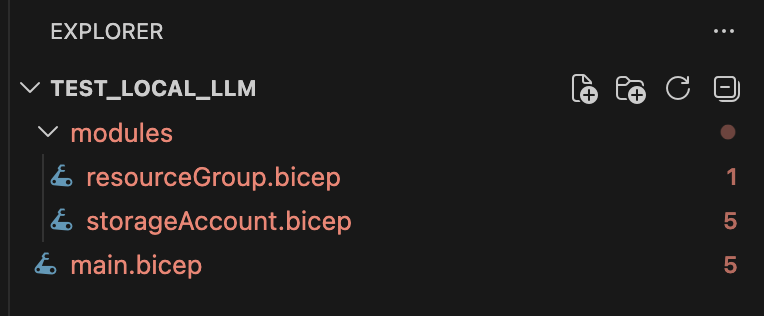
Technically, it created all the files I asked for, but they were all still marked red in VS Code, meaning the code wasn’t usable without fixes.
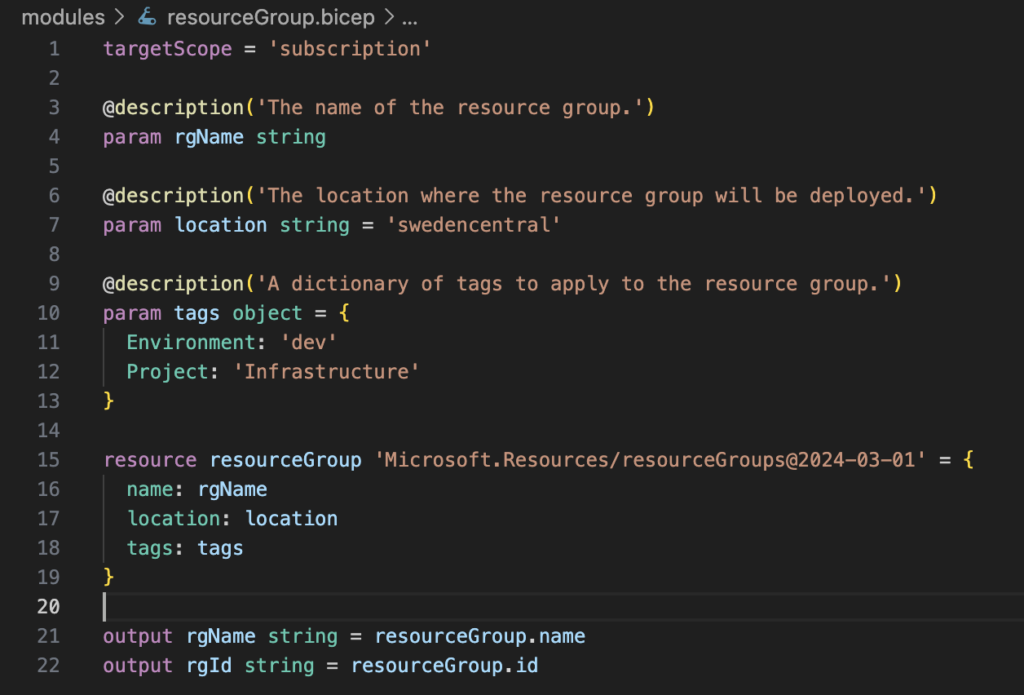
The resource group module was missing targetScope = ‘subscription’
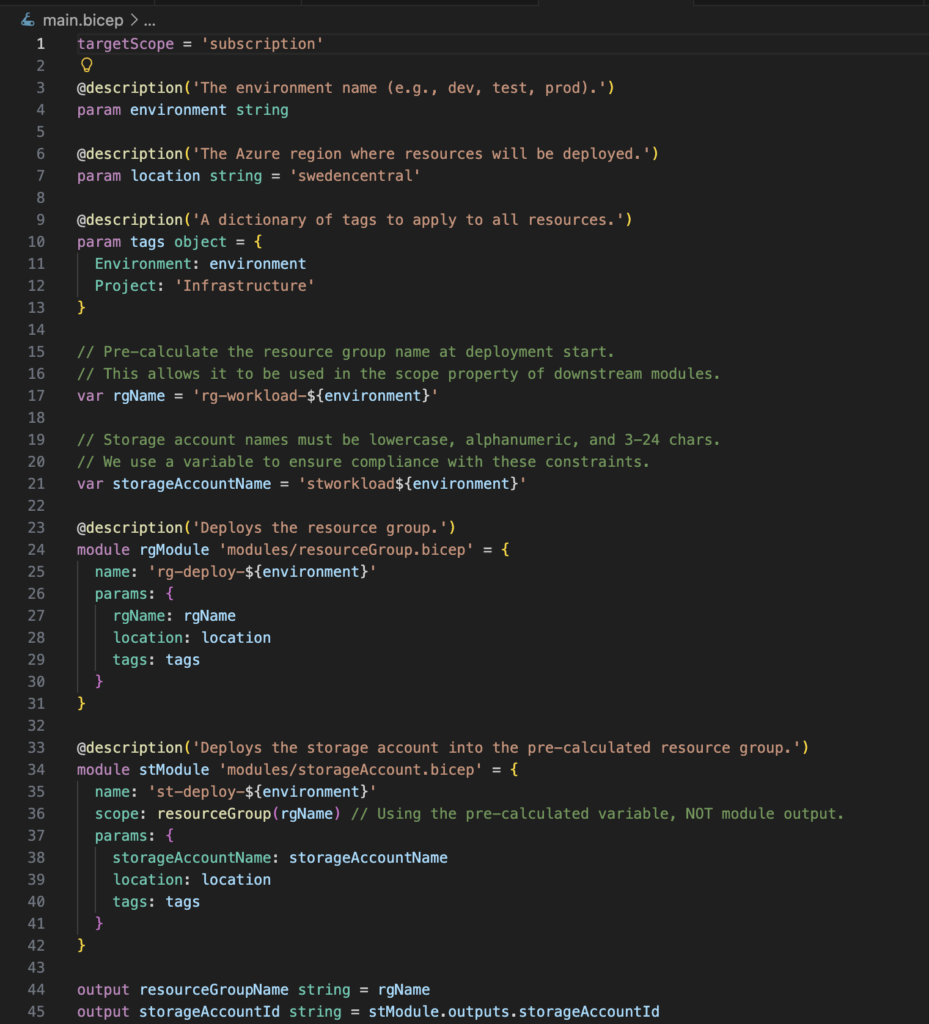
The storage account module had three stray backticks at the end
main.bicep struggled with correctly setting scopes
The conclusion
For an initial test, the Continue extension worked very well overall. The experience felt quite similar to GitHub Copilot.
I got the files I asked for, and the generated code definitely looked like Bicep, but the elephant in the room is that I still didn’t get anything deployable straight out of the box.
How to make it better
The generated code was Bicep, but it still struggled with fairly basic Bicep concepts. So the next step was figuring out how to improve the output quality.
Instructions
Most LLMs are not especially well-trained for Bicep because, while it’s widely used within Azure environments, it doesn’t have the same broader ecosystem exposure as languages like Python or JavaScript.
Because of that, giving the agent proper instructions becomes extremely important.
You may already be using instruction files with cloud-based AI assistants, but with local LLMs they are almost mandatory due to the more limited resources and context windows.
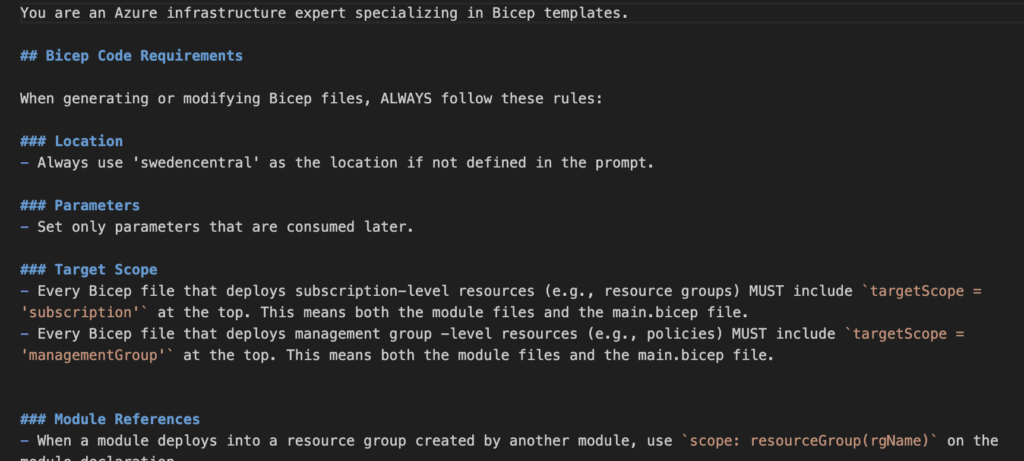
For the instructions, I cheated a bit and used Claude Opus through Copilot to generate a proper ruleset for Bicep code generation.
The difference in output quality was huge!
The setup is simple:
- Create an .md file under .continue/rules
- Add your coding rules and conventions there
I named mine bicep.md, and you can download it here.
Giving your agent smaller tasks
This is just as important as instruction files and this was also the case with cloud LLMs couple of years ago. Local models have limited context windows, so splitting work into smaller tasks improves both reliability and speed. The model no longer needs to reason about the entire codebase in a single pass. This will lower the chances of hallucinations and missing code significantly.
Take #2
With the instructions in place, I reran the task but split it into multiple smaller prompts.
You can see below that Continue now correctly detects and uses the rules file:
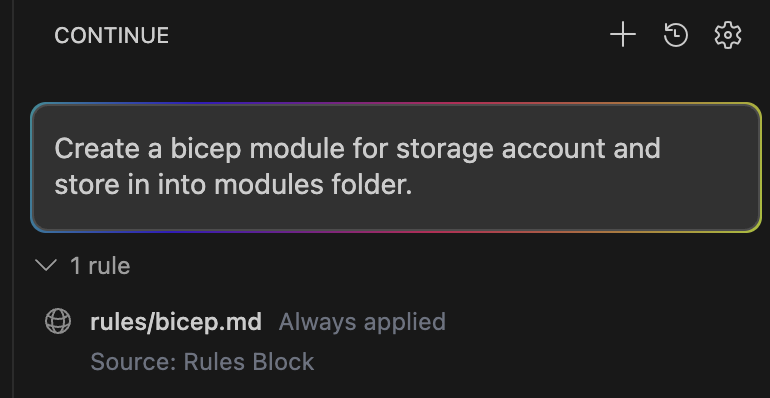
The improvement in output quality was honestly pretty dramatic.
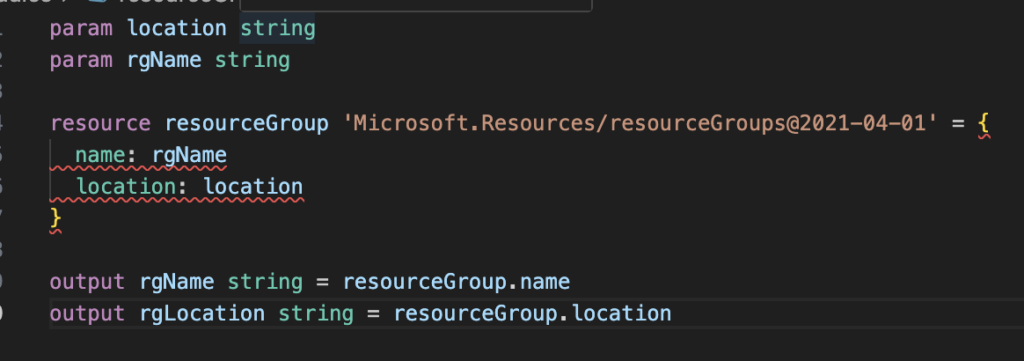
Next, I generated the resource group module separately, and that also looked much better:
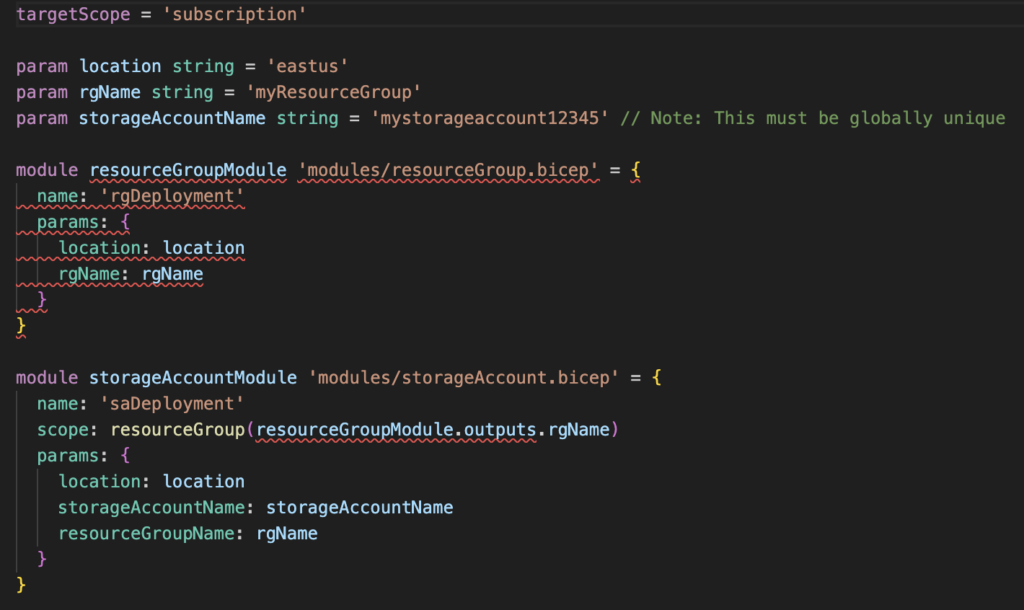
Finally, I asked it to generate main.bicep while giving both modules as context:

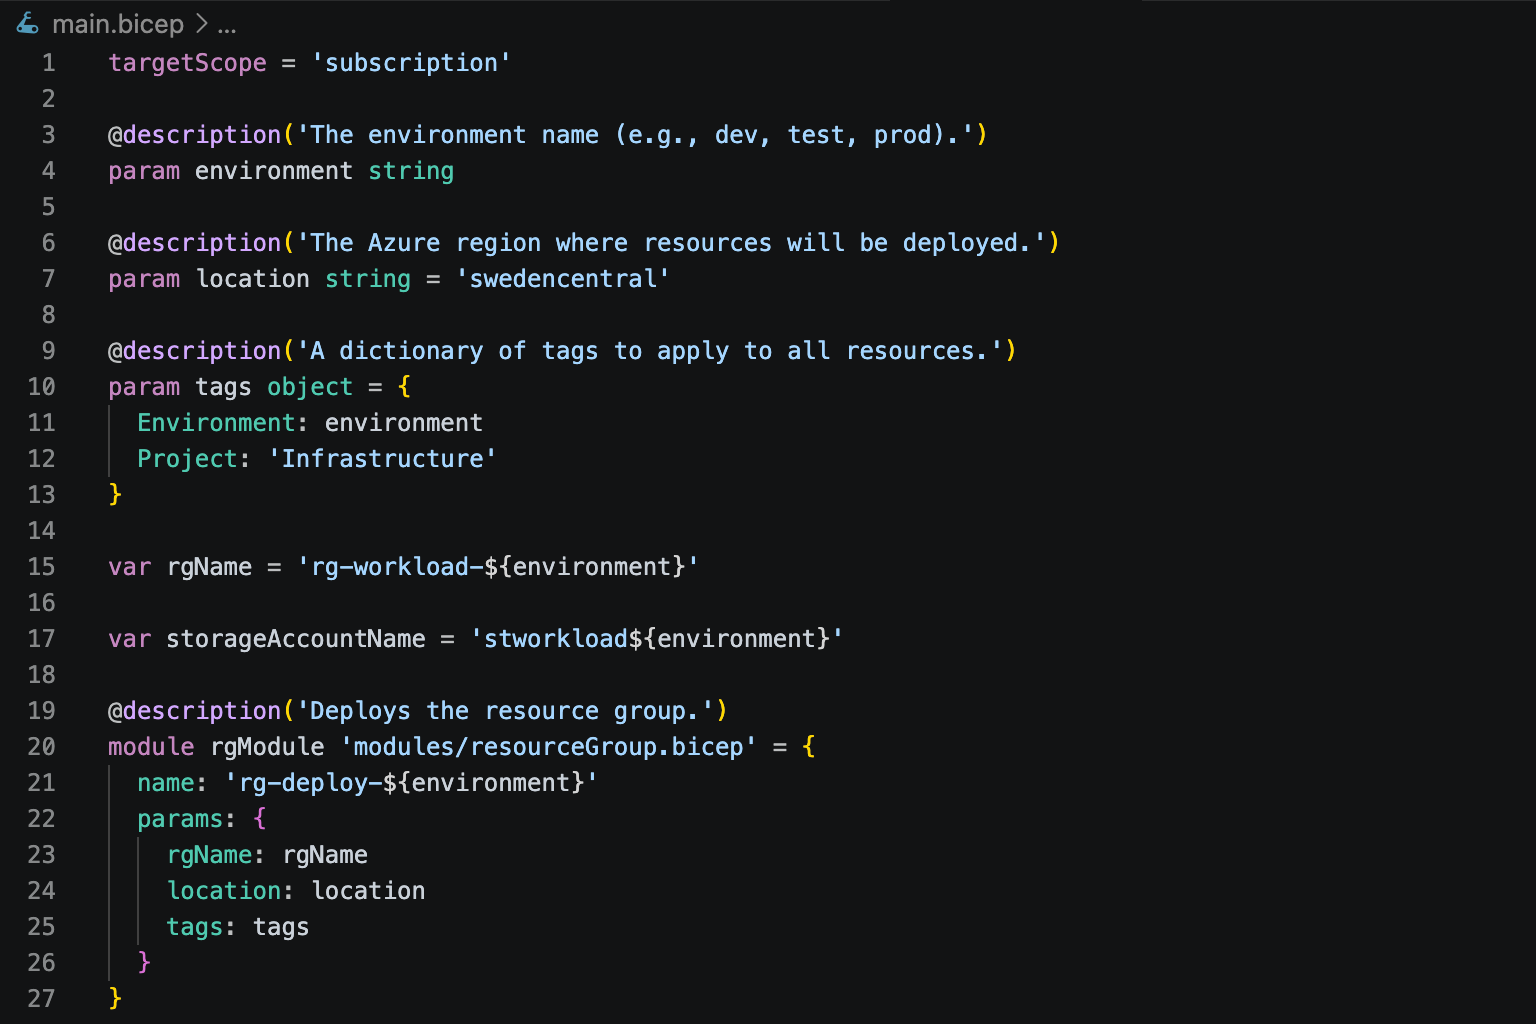
And this is what the final main.bicep looked like:
Hooray! We finally have some decent-looking and deployable Bicep code!
Final thoughts
It turns out that generating working Bicep code using fully local LLMs is absolutely possible, but getting there requires some tuning.
Hopefully this article helps you avoid some of the trial-and-error process I had to go through myself.
In the end, the biggest factor is still hardware. The more powerful your machine is, the less tweaking you’ll need.
On a modern machine with enough RAM, you can get surprisingly close to the cloud-based Copilot experience. Larger models can often complete tasks correctly in a single prompt and do it much faster as well.
That said, a proper instructions file is still extremely valuable, even with more capable hardware.